
High maximum strength cannot replace operational rescue capacity, which relies on managing lever arms, surface friction, grip endurance, and efficient backward dragging mechanics.





You step into a smoke-filled hallway or a narrow stairwell with an unresponsive individual on the floor. Your gear is heavy, your heart rate is elevated, and you have to move a 190-pound adult twenty yards to safety before clearing the structure. In that moment, gym strength alone is rarely enough. Success depends on your grip endurance, your trunk stability under awkward loads, your foot traction, and your ability to coordinate every movement with your partner.
Rescue-task capacity is the operational ability to lift, drag, carry, and maneuver heavy, unstable loads under severe metabolic and environmental fatigue. It is not simply a high one-rep maximum deadlift or bench press. True capability requires a blend of multi-planar strength, specialized grip stamina, joint resilience, tactical pacing, and rapid systemic recovery. This guide breaks down the science and mechanics of moving human and equipment loads so you can build durable, career-long physical readiness.
Every rescue task falls under the broader occupational category of manual material handling. Whether you are advancing a charged hose line, moving an unconscious patient on a backboard, or hauling extrication tools across a highway median, the underlying biomechanics remain consistent. Manual material handling includes lifting, lowering, pushing, pulling, carrying, holding, and restraining. In emergency services, these tasks are compounded by unpredictable environments, uncooperative or shifting loads, and urgent time limits.
Occupational health research separates physical capacity into distinct operational layers:
Research published in military and occupational health journals shows that manual handling is strongly associated with acute low-back strains and cumulative musculoskeletal injuries. These injuries spike when tasks are prolonged, highly repetitive, or performed in awkward postures. Emergency personnel cannot always maintain perfect textbook lifting form in the field. Therefore, physical preparation must build a wide margin of safety across compromised positions, irregular stances, and rotating movement planes.
A high gym total does not guarantee operational success. An operator may possess substantial lower-body power yet fail early in a victim drag due to rapid forearm cramping or an unstable trunk. Evidence examining simulated firefighting performance indicates that grip strength, lower-body force production, upper-body pulling power, and aerobic capacity all independently correlate with faster task completion. Strength provides the foundation, but movement efficiency, coordination, and fatigue resistance determine real-world performance.
Evaluating any heavy drag or carry requires looking beyond the weight written on a specification sheet. Operational difficulty is governed by four interacting variables: the load itself, the lever arms involved, the ground surface, and the speed of execution. Adjusting any one of these factors radically alters the strain placed on your musculoskeletal system.
Load characteristics extend far beyond absolute scale weight. You must evaluate how that mass is shaped, whether it is rigid or floppy, and how its center of mass moves during transit:
The mechanical advantage you maintain over a load dictates spinal and joint loading. Biomechanical frameworks from occupational safety research highlight horizontal distance from the spine as a primary injury risk factor. When a heavy object moves farther away from your center of mass, the internal torque required from your back extensors multiplies dramatically.
Keeping a load close to your pelvis reduces the external lever arm. Carrying a sixty-pound tool pack against your torso places manageable compressive loads on the vertebrae. Holding that exact same pack eighteen inches away from your chest triples the shear forces acting on your lumbar discs. In rescue drags, maintaining low, tight grip attachments keeps the line of force closer to your hips and reduces force leakage through your upper back.
The ground beneath you alters the physical work required to complete a drag. A rescue mannequin that glides across polished linoleum with eighty pounds of pulling resistance may require over two hundred pounds of force across wet grass, mud, or thick carpet.
Operational urgency naturally tempts responders to sprint during extractions. However, rapid acceleration introduces high inertial forces that can compromise spinal position or tear grip purchase. Candidate physical ability tests routinely use a timed 165-pound mannequin drag across a seventy-foot course to evaluate raw capability. Similarly, work-capacity protocols frequently measure dummy-drag speed across thirty-meter distances under simulated operational fatigue.
Speed must be applied deliberately. A controlled, powerful stride that maintains traction and stable breathing is consistently faster than an uncontrolled sprint that ends in grip failure or a stumble. Pacing allows you to preserve neuromuscular control for the remainder of the incident.
Excelling at rescue-task manual handling requires targeting specific physical capabilities in your weekly training. These qualities must work together to move heavy loads efficiently while protecting your spine, shoulders, and knees from excessive wear. Developing them systematically builds resilient duty fitness that withstands chaotic calls.
Grip is often the first component to fail during a sustained drag or carry. Once your hands open, the task stops regardless of how strong your legs or back might be. Occupational studies in firefighting consistently show strong correlations between grip performance and rapid completion times across hose drags, tool carries, and casualty evacuations.
Responders require several distinct categories of hand and forearm strength:
Grip should not be trained solely as an isolated wrist flexor exercise. Hand strength relies heavily on shoulder stability, lat engagement, and trunk bracing. When the shoulder blade is properly set, force transfers cleanly down the arm, reducing premature forearm fatigue.
During heavy manual handling, your torso acts as a bridge transferring power from your hips into your hands. Your spine must resist unwanted movement rather than generate active flexion or twisting under heavy external loads.
Occupational lifting guidelines consistently emphasize the dangers of uncontrolled spinal twisting combined with forward bending. Developing anti-rotation, anti-lateral flexion, and anti-extension capacity enables you to absorb sudden balance perturbations without straining lumbar tissues. Exercises like suitcase carries, heavy front-loaded holds, and split-stance cable presses train the deep abdominal wall and spinal erectors to create an unyielding cylinder of stability.
Your hips, glutes, hamstrings, and quadriceps provide the primary engine for moving heavy mass horizontally and vertically. Breaking a heavy casualty away from a resting position demands high starting strength and hip extension power.
Key lower-body physical priorities include:
Dragging a heavy load triggers an immediate spike in cardiovascular and metabolic demand. Research assessing simulated firefighter tasks shows extreme heart rate elevations and high blood lactate accumulation within two to three minutes of heavy work. Rescue tasks challenge both the anaerobic glycolytic system for immediate horsepower and the aerobic system for rapid recovery between efforts.
A well-developed aerobic base accelerates phosphocreatine resynthesis, clears metabolic byproducts, and lowers baseline heart rates during prolonged incidents. Interval work using sleds, weighted carries, and short dummy drags trains your body to function smoothly despite severe systemic burning and respiratory distress.
Translating strength into field performance requires sound biomechanics tailored to the specific task. Minor adjustments in foot placement, body angle, and grip orientation can dramatically reduce physical strain and prevent premature exhaustion.
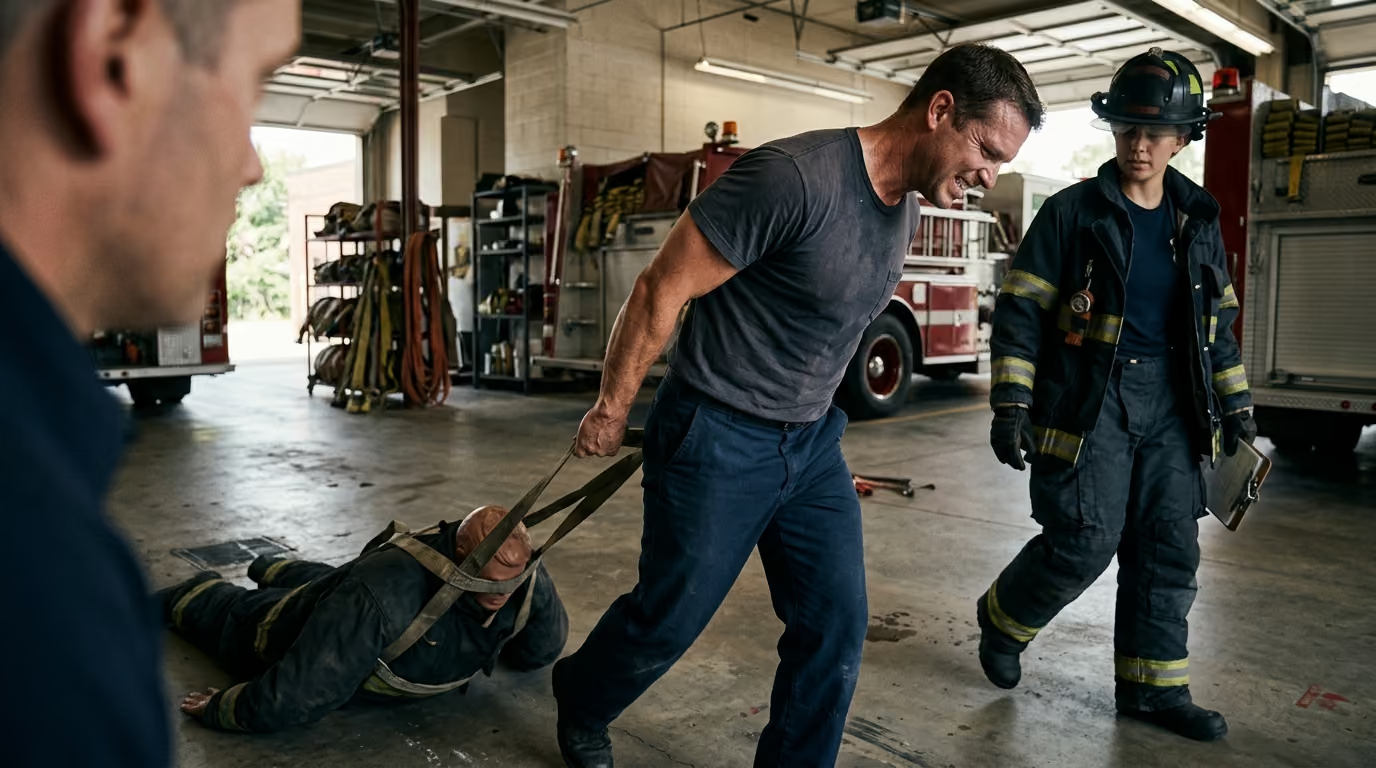
The backward drag is the most common technique for moving an unconscious casualty rapidly over smooth or level terrain. It allows you to use your body weight as a counterweight against the load.
To execute a backward drag safely:
Avoid taking long, lunging steps backward. Overstriding reduces ground contact area, compromises your balance, and dramatically increases the risk of tripping over unseen obstacles.
Forward dragging is advantageous when navigating narrow hallways, descending ramps, or pulling over long distances where you need clear forward vision. Using a piece of tubular webbing looped around the casualty's torso creates a secure handle that allows you to face the direction of travel.
Forward dragging shifts the muscular demand heavily toward your quadriceps and anterior core. Maintain an athletic forward lean from your ankles rather than bending entirely at your lower back. Keep your strides short and rhythmic, pushing the ground away behind you while maintaining a rigid torso.
Carrying methods vary depending on the object's dimensions, rigidity, and the distance you must travel. Occupational research recommends adapting your carry style directly to the load profile:
Moving heavy casualties or awkward equipment with two or more responders alters the mechanical demand significantly. A two-person lift does not automatically halve the physical effort for each person. Without precise coordination, one responder often ends up supporting an overwhelming majority of the weight.
Poor partner coordination leads to unsynchronized movement, erratic load shifts, and sudden balance losses. If one operator accelerates while the other pauses, the dynamic shock load can easily cause an acute muscle strain. Building reliable team handling requires standardized communication and clear role allocation.
Every multi-person carry must have an assigned team leader who issues clear, concise, and predictable verbal commands. The leader is typically the person positioned at the casualty's head or the operator with the clearest view of the exit pathway.
Standard operational commands should include:
Responders must never initiate a turn, change grip, or drop a load without verbalizing their intent beforehand. Announcing adjustments gives your partner time to brace and redistribute their balance.
Responders rarely share identical heights or physical capabilities. When partners are poorly matched, the shorter responder often bears an unequal share of a stretcher or litter load on sloped surfaces, while the taller responder experiences awkward spinal angles.
When working with mismatched pairs:
Understanding how to preserve your physical readiness during these intense duty events is critical for long-term health and sustainable career longevity.
Rescue tasks rarely occur under comfortable conditions. Heavy protective clothing, elevated ambient temperatures, and accumulated duty fatigue combine to degrade your physical capacity rapidly. Managing these operational stressors is vital for maintaining performance and preventing heat-related illness.
Understanding the difference between perceptual tiredness and underlying neuromuscular depletion is essential for pacing and safety. You may catch your breath within a few minutes after a hard extraction, but your nervous system and grip strength take significantly longer to recover.
Research examining military personnel performing heavy loaded carriage reveals that lower-body power and maximal strength remain depressed for 48 hours or more, even when subjects report feeling completely recovered. Systematic reviews on stretcher carries show measurable grip-strength reductions lasting up to 72 hours after heavy loading bouts. Relying entirely on how refreshed you feel can lead to premature overloading in subsequent training sessions.
Structural firefighting gear and heavy tactical vests trap metabolic heat, preventing evaporative sweat cooling. As core temperature climbs, blood volume is diverted to the skin for cooling, decreasing blood flow to working muscles and drastically elevating your heart rate.
Occupational health guidelines from NIOSH emphasize proactive hydration and structured cooling protocols during hot operations:
Acclimatization is equally important. NIOSH recommends a gradual exposure protocol spanning seven to fourteen days for workers newly exposed to hot environments. This progressive adaptation allows the cardiovascular system to expand plasma volume and sweat more efficiently.
Building exceptional rescue capacity requires a progressive, phased approach. Rather than jumping directly into high-intensity, maximal-effort dummy drags that risk acute injury, progress systematically through foundational movement, raw strength, task-specific loading, and simulated operational conditioning.
The foundation begins with mastering neutral-spine hinging, deep squatting, and foundational core bracing without external speed or panic.
Key training priorities:
Spend two to four weeks in this phase until all movement patterns are consistent and pain-free.
Once mechanics are sound, focus on developing absolute force production in your hips, back, and legs. Resistance training standards from the American College of Sports Medicine recommend using heavy loads around 80 percent of one-repetition maximum to maximize strength adaptations, alongside moderate loads moved rapidly for power development.
Core movements include:
For detailed guidance on balancing these high-intensity strength sessions with irregular operational hours, consult our guide on training around shift work.
Phase 3 introduces awkward, dense implements that mimic real-world rescue tools and casualties.
Incorporate these exercises twice weekly:
In this phase, sequence multiple movements back-to-back with incomplete recovery to replicate the metabolic demands of emergency calls.
Example work-capacity circuit:
Research in military physical training cautions against performing high-intensity load-carriage simulations too frequently. Limiting specific heavy loaded carriage sessions to once every seven to fourteen days (and no more than four times per month) minimizes connective tissue overuse while sustaining performance gains.
The final stage applies your conditioning under realistic field conditions. Perform controlled scenarios wearing your operational boots, duty pants, and protective jacket. Practice team carries over variable surfaces, around tight corners, and through doorway thresholds.
Keep these simulations controlled and measured. Training under realistic constraints is designed to refine communication and pacing, not to induce extreme exhaustion or technique breakdown.
Responders often make predictable training errors that compromise their readiness or lead to avoidable injuries. Recognizing these traps helps you program your workouts more effectively:
To learn more about adjusting your training volume based on your daily physiological readiness, read our autoregulation guide for first responders.
Managing high physical loads requires establishing clear boundaries for when to train, when to modify, and when to pull back entirely. Implementing a structured traffic-light framework helps you make sound decisions regarding duty readiness and injury prevention.
Assess your movement quality and physical state before every high-load training session or heavy drill:
For ongoing management of chronic occupational aches, explore our comprehensive resources on injury prevention and recovery.
Never ignore persistent musculoskeletal or systemic warning signs. If you experience radiating leg pain, severe joint swelling, unrelenting back spasms, or persistent dizziness following a heavy call, consult an occupational physician, physical therapist, or qualified sports medicine clinician. Professional assessment ensures that minor disc bulges, ligament sprains, or tendon issues are resolved before they become career-threatening injuries.
Review this guide whenever you prepare for physical candidate testing, return from an extended injury layoff, or notice your grip and lower-back stamina declining during routine emergency operations.
Sustainable rescue capacity is built through consistent, progressive strength development, deliberate movement mechanics, and disciplined recovery habits that preserve your body over an entire career.
Stay connected for research-led guidance on duty fitness, shift-work sleep, injury recovery, stress, nutrition and career longevity. Practical ideas for first responders who want to stay capable on the job, recover well and protect their health for the long run.



Read practical guidance on first responder fitness, recovery, sleep, nutrition and resilience for demanding work and a long, active career.
read the blog